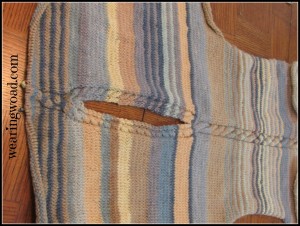
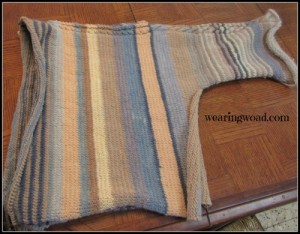
It’s taken a few weeks to knit the front and back of the sweater, and I am now up to the point of rejoining to finish the neck and form the other shoulder. Only 1/3rd of the sweater left to knit, and it is getting quite bulky and can be slightly awkward to carry around with me. But, it’s still fun to knit, and an enjoyable project for the “listening” minutes throughout the day. 

Thanks to the size that the vertically stripped sweater has become, I have ended up with more questions regarding it. The most interesting are the conversations with other knitters who, have “never seen a sweater knit that way before.”
The front and back of the sweater are of equal size, both being 10 inches, or 44 rows. If you have a bigger chest, you may want to knit an extra inch or two in the front compared to the back. Though, knitting is quite forgiving and stretchable.
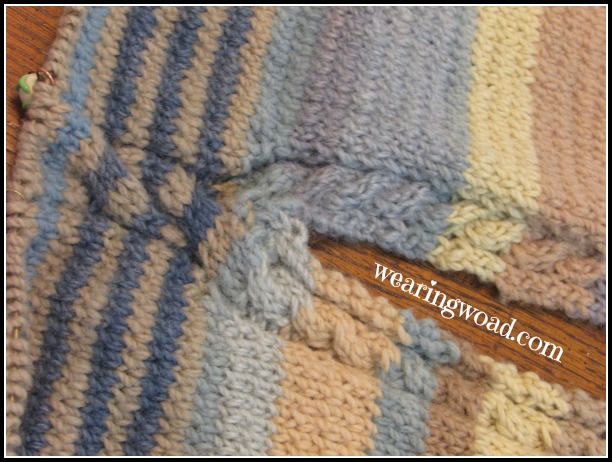
One thing I like doing is changing colors on a cable row, and I changed both colors and shifted to my slightly heavier weight of yarn for this join. The color change helps with counting the rows and telling where I am in my knitting.
To Finish the Neck and Begin the Second Shoulder:
For the sake of the design and ease of cable crossing, I do the first rejoining row on a cable row.
Row One: Just before your first stitch marker on the cable row, knit into the front and back of the stitch. Purl two, and cable as normal, purl two and knit one. Knit the last stitch of this side together with the first stitch of the opposite side. This is your first joining stitch. Then, knit one, purl two, cable four, purl two, shift your stitch marker and knit into the front and back of the next stitch. Knit to the end of the row.

Row Two: Purl to the stitch before your stitch marker, purl into the front and back of the stitch. Shift your marker and knit two, purl your 4 cable stitches, knit one, knit two together. purl two together, knit two together (decrease by 3), knit one, purl 4, knit 2, shift your stitch marker and purl into the front and back of the next stitch. Purl to the end of the row.
Row Three: Knit to the stitch before your stitch marker, knit into the front and back of this stitch and shift your marker. Purl two, knit four, purl two together, purl two together, knit four, purl two. Shift your stitch marker and knit into the front and back of the next stitch, knit to the end of the row.
Row Four: Purl to the stitch before your stitch marker. Purl into the front and back of that stitch. Knit two, purl three, purl two together, purl two together, purl three, knit two, shift your marker and purl into the front and back of the next stitch, purl to the end of the row.
Row Five: knit as normal
Row Six: Purl as normal
Row Seven: Knit to your first marker, purl two, do your four stitch cable crossing BEHIND (or opposite of what you did on the other side of the sweater). Purl two, and knit to the end of the row.
Continue standard cable and full width knitting for 4 cable crosses, or 4 inches, to match what you did on the other side of the sweater.
Decreasing to the Sleeve:
When you reach your matching shoulder lengths, it is time to decrease back to sleeve width.
On a knit row, using a loose standard cast-off to cast off the first 50 stitches. Knit to the end of the row. This may be a cable row, depending on your count.
On the next purl row, cast off the first 50 stitches as per the first side. Purl the rest of the row as normal. You will be left with 90 stitches for your sleeve, the same number you initially cast on.
Continue alternating knit and purl rows, with cable crosses as necessary for the next 36 rows to finish your sleeve.
Cast off sleeve as normal. To match the first side, the sleeve should have the last cable crossing 8 rows from the cast off row.
Weave in ends as normal.

Part Five of the Vertically Stripped Sweater will cover sewing up the sides and other finishing touches. Though it may take me a week or three to get my sweater all the way to that point. I hope you have enjoyed the sweater walk through so-far.
If you haven’t seen the other parts of this series they are:
Part One: Starting the sweater from sleeve to shoulder.
Part Two: Variation and Pictures for Perspective
Part Three: Dividing for the neck and knitting the body.
Back To You:
What do you think of this sweater knitting technique? Have you enjoyed it so far?
Leave a comment, I enjoy hearing from you!